Tattooing Process
Your Tattoo Journey: From First Step to Final Aftercare
Welcome to InkSpot Tattoo Studio, where your dream tattoo becomes a reality! We’re here to guide you through every step of the tattooing process with care, creativity, and professionalism. Whether it’s your first tattoo or your tenth, we make sure your experience is exciting, safe, and memorable. Let’s walk you through the entire process, from the moment you step into our studio to when you leave with your new artwork and aftercare instructions. It’s like a fun adventure, and we’ll explain it so clearly that even a 10-year-old can understand!
Step 1: Walking Into the Studio
When you first arrive at InkSpot Tattoo Studio, you’ll feel like you’re stepping into a cozy, creative world. Our studio is clean, bright, and filled with colourful artwork on the walls to spark your imagination. You’ll be greeted by our friendly front desk staff, who are like the tour guides of your tattoo journey. They’ll ask if you have an appointment or if you’re just visiting to talk about ideas.
If you’re new, don’t worry! We’ll sit with you to discuss what you want. Maybe you have a picture of a star, a flower, or even a superhero you love. If you don’t have an idea yet, we’ll show you books filled with designs or help you create something special. This is called a consultation, and it’s like planning a cool art project. You’ll tell us what you like, where you want the tattoo (like on your arm or leg), and how big it should be. We’ll also talk about colors, like if you want a bright red heart or a black-and-white dragon.
Our staff will explain how much the tattoo might cost and how long it will take. For example, a small tattoo, like a tiny butterfly, might take an hour, but a big one, like a lion covering your back, could take a few visits. We’ll also check if you’re old enough (you need to be at least 18) and make sure you’re healthy for a tattoo. If you’re ready, we’ll book your appointment!
Step 2: Preparing for Your Tattoo Day
Before your tattoo day, we’ll send you a list of things to do, like getting ready for a big day at school. You should eat a good meal, like a sandwich or some fruit, so you have energy. Drinking water is super important too, because it keeps your skin happy. Don’t drink soda or coffee, though, because they can make you jittery. We also ask you to wear comfy clothes, like a T-shirt, so the artist can easily reach the spot where your tattoo will go.
When you come back for your appointment, we’ll check your ID and have you fill out a form. This form is like a permission slip that says you’re okay with getting a tattoo. It also asks if you have any allergies or health issues, so we can keep both you and our artists safe. Once that’s done, you’re ready to meet your tattoo artist!
Step 3: Meeting Your Tattoo Artist and Finalizing the Design
Your tattoo artist is like a superhero with a paintbrush, except they use a special tool called a tattoo machine. They’ll show you the design they drew based on your ideas. It’s like seeing your imagination come to life on paper! For example, if you wanted a puppy tattoo, they might show you a sketch of a cute dog with floppy ears. You can say, “Can you make the ears bigger?” or “Can it have a blue collar?” The artist will make changes until you love it.
Once you’re happy, the artist will turn the drawing into a stencil, which is like a temporary sticker of your design. They’ll place it on your skin to make sure it looks perfect. You’ll get to see it in a mirror and say, “Yup, that’s it!” If it’s not quite right, they’ll move it or adjust it. This step is super important because it makes sure your tattoo goes exactly where you want it.
Step 4: Getting Ready for the Tattoo
Now it’s time to get comfy! You’ll sit or lie down on a special chair or table, like at the doctor’s office, but way cooler. The artist will clean your skin with a wipe that feels cold and smells like medicine. This makes sure there’s no dirt or germs. If there’s hair where the tattoo will go, they will shave it off with a small razor. Don’t worry, it’s quick and doesn’t hurt!
Next, the artist puts on clean gloves, like a chef washing their hands before cooking. They set up their tools, including the tattoo machine, which looks like a pen but makes a buzzing sound. The machine has a tiny needle that puts ink into your skin, kind of like colouring with a super precise marker. They also prepare little cups of ink in the colours you chose, like red, black, or blue.
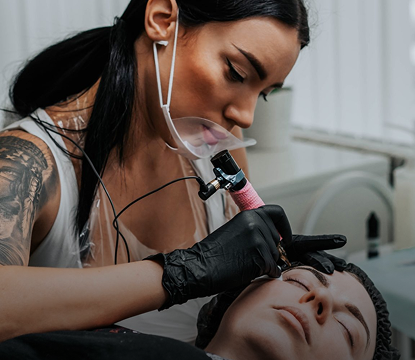
Step 5: Getting Your Tattoo
Here’s the exciting part—getting your tattoo! The artist will start by pressing the tattoo machine against your skin. It feels like a scratch or a pinch, kind of like when you accidentally scrape your knee. For some people, it’s no big deal, and for others, it stings a little. If it feels uncomfortable, you can tell the artist, and they’ll go slower or give you a break. You can also chat, listen to music, or even watch a show on your phone to stay relaxed.
The artist follows the stencil to draw your design, dipping the needle into the ink to add colour. They work carefully, like painting a picture, making sure every line and shade is perfect. For a small tattoo, this might take 30 minutes to an hour. Bigger tattoos might need a few hours or even a few visits to finish.
Step 6: Finishing Up
When the tattoo is done, the artist will wipe your skin to clean off extra ink. You’ll get to see your new tattoo in a mirror, and it’ll look awesome! Your skin might be a little red or puffy, like after playing outside, but that’s normal. The artist will put a thin layer of ointment (like lotion) on your tattoo to keep it moist, then cover it with a bandage or plastic wrap to protect it.
Step 7: Aftercare Instructions
Before you leave, we’ll give you a sheet with aftercare tips, like a homework assignment to keep your tattoo looking great. Here’s what you need to do:
- Keep it clean: Wash your tattoo gently with mild soap and water a few hours after getting it. Pat it dry with a clean towel.
- Moisturize: Put a thin layer of special tattoo ointment or unscented lotion on it a few times a day. Don’t use too much!
- Don’t scratch or pick: Your tattoo might itch as it heals, like a bug bite. Don’t touch it, or it could get messy.
- Stay out of the sun: Keep your tattoo covered or use sunscreen so the colours don’t fade.
- No swimming or soaking: Avoid pools, hot tubs, or baths for about two weeks while it heals.
Your tattoo will take about 2–3 weeks to heal. At first, it might look shiny or flaky, like a peeling sunburn. That’s just your skin healing! If it gets very red, swollen, or oozy, call us or see a doctor, but that’s super rare.
Step 8: Leaving the Studio
You’re all done! You’ll leave InkSpot Tattoo Studio with a big smile and a brand-new piece of art on your skin. We’ll remind you to come back if you want to add more to your tattoo or get a touch-up (like fixing a colouring book page). You can also share a picture of your tattoo with us online—we love seeing your new ink!
Our team is always here if you have questions or want to plan your next tattoo. Your journey with us doesn’t end when you walk out the door—it’s the start of a lifelong adventure with your unique artwork!
Why Choose InkSpot Tattoo Studio?
At InkSpot, we’re not just about tattoos—we’re about making you feel special and safe. Our artists are trained, our tools are super clean, and our studio follows all the rules to keep you healthy. We love turning your ideas into tattoos you’ll show off for years. Whether it’s a tiny heart or a giant dragon, we’re here to make your tattoo journey fun, easy, and unforgettable.
Ready to start? Book your tattoo today, and let’s create something amazing together!